MicroPython development workflow has transformed embedded programming by enabling developers to utilize Python on microcontrollers like the ESP32. Paired with the Thonny IDE, this workflow becomes seamless and user-friendly. Whether you’re a beginner or an advanced programmer, mastering the MicroPython development workflow with Thonny is key to unlocking productivity and efficiency.
Table of Contents
Introduction to Thonny and MicroPython
Thonny is an excellent IDE tailored for Python development, offering a minimalistic and intuitive interface that’s perfect for MicroPython projects. Once you’ve installed Thonny and set up the MicroPython interpreter, connecting your ESP32 via USB unlocks powerful features for coding, testing, and deploying projects. This article explores two primary coding workflows in Thonny: using the REPL (Read-Eval-Print Loop) for testing and the text editor for larger projects, along with tips for managing files effectively.
Read more here: Setting Up the ESP32 Development Environment with MicroPython and Thonny: A Step-by-Step Guide
1. Coding in the Shell or REPL
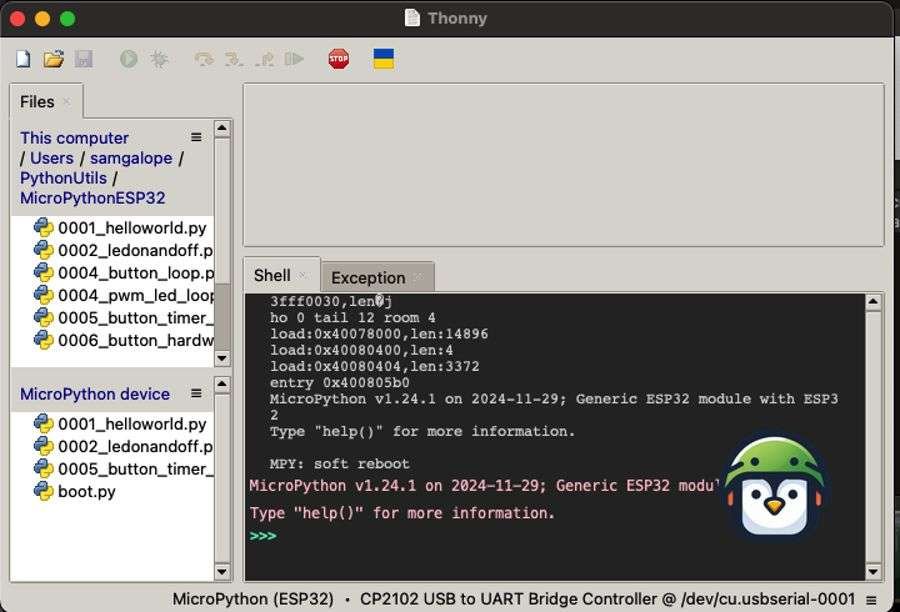
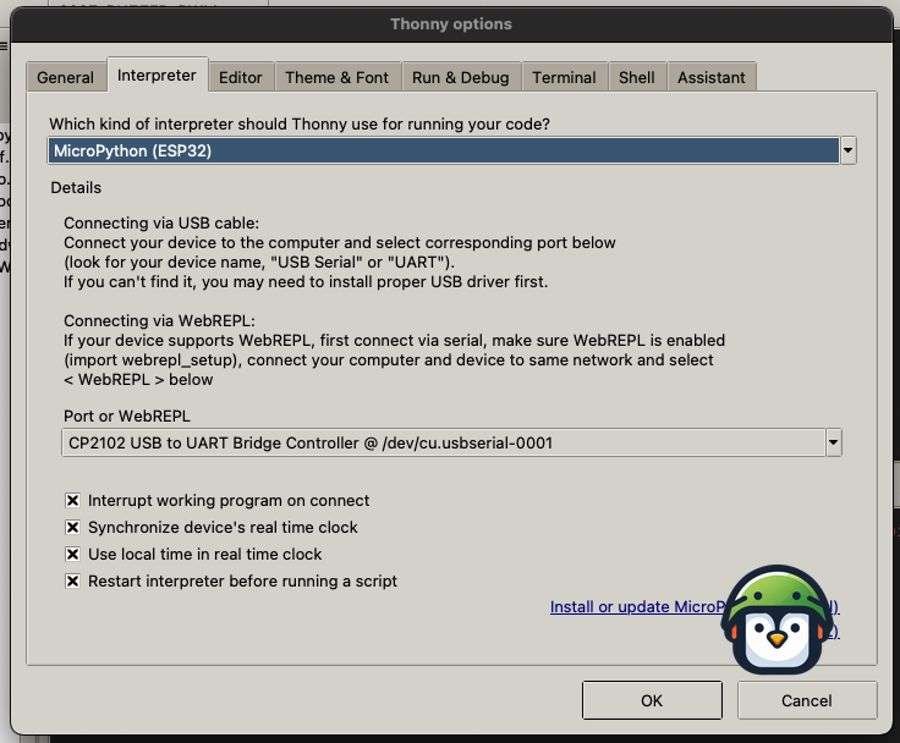
The REPL is an interactive shell that allows you to type and execute code directly, making it a cornerstone of the MicroPython development workflow. In Thonny, if you’ve selected the MicroPython ESP32 interpreter under Tools > Options, the REPL runs code directly on the ESP32, not your computer. This is crucial for ensuring compatibility with the hardware-specific features of the ESP32, such as GPIO pin control or accessing onboard sensors.

Use Cases and Benefits
- Testing Ideas: Quickly validate small pieces of code, such as a loop or function logic.
- Debugging: Use print statements or interactively inspect variables to troubleshoot.
- Efficiency: Instant feedback without needing to write full scripts or upload files.
For instance, if you’re testing a new function for an LED control project, the REPL allows you to toggle GPIO pins in real time. This eliminates the need to repeatedly save and upload files, saving both time and effort.
2. Coding in the Thonny Text Editor
For larger projects, such as building a weather station or a home automation system, the text editor in Thonny becomes the central part of your MicroPython development workflow. Unlike the REPL, the text editor allows you to create, edit, and save longer scripts. These scripts can then be run directly on the ESP32, as Thonny executes the code on the device rather than your computer.
Use Cases and Benefits
- Project Management: Organize long codebases for structured development.
- Reusability: Save and reuse scripts across projects.
- Readability: The editor provides syntax highlighting and error checking for cleaner code.
When working on a larger project, such as a weather data logger, the text editor allows you to write multi-function programs that integrate with various sensors. By saving the script directly to the ESP32, you ensure that it’s ready to run whenever the device powers on.
Using the Files Panel
The Files panel in Thonny bridges the gap between your computer and the ESP32, streamlining the MicroPython development workflow. You can easily transfer scripts from the editor to the ESP32’s storage or manage files already on the device. Scripts saved from the editor to the ESP32 appear with their filenames enclosed in square brackets, e.g., [main.py].
How to Use the Files Panel
- Upload Programs: Drag and drop or save files directly to the ESP32’s filesystem.
- Organize Files: Create directories or delete outdated scripts.
- Run Scripts: Use the panel to select and execute specific files on the device.
This feature is invaluable for multi-file projects or when deploying a script that needs to run automatically on startup, such as a main.py file.
Conclusion
Thonny’s MicroPython development workflow offers flexibility and ease of use, making it an ideal choice for ESP32 programming. The REPL is perfect for quick tests and debugging, while the text editor supports larger, more complex projects. With the Files panel, managing scripts and deploying them to your ESP32 becomes a breeze.
Whether you’re experimenting with small scripts or building full-scale IoT applications, mastering the MicroPython development workflow ensures a smooth and productive development experience. This combination of tools not only boosts efficiency but also enhances your understanding of embedded systems. Dive in, and let your creativity flow with MicroPython and Thonny!


Leave a Reply