

They told me I couldn’t manage infra from my phone. Then I showed them SSH on Termux.
Managing remote servers on a laptop sounds easy—until you’re stuck in traffic, away from your desk, or worse, dealing with a sudden issue at 2 AM with nothing but your phone. I’ve been there.
One time, a critical service went down while I was out, and all I had was my Android device. No laptop, no quick access to my usual SSH setup.
That’s when I realized the power of SSH on Termux—a lightweight yet powerful solution that lets you securely access and control remote servers straight from your phone.
With Termux, you don’t need a dedicated machine to handle server tasks. Whether you’re fixing a broken web app, pulling repo updates, or managing databases, SSH on Termux turns your phone into a sysadmin’s best friend.
This guide will walk you through setting up SSH, securing your connection, and tackling common issues—so the next time duty calls, you won’t need to scramble for a laptop.
Get my FREE Termux Cheat Sheet Now!
- Setting Up SSH on Termux: What to Expect
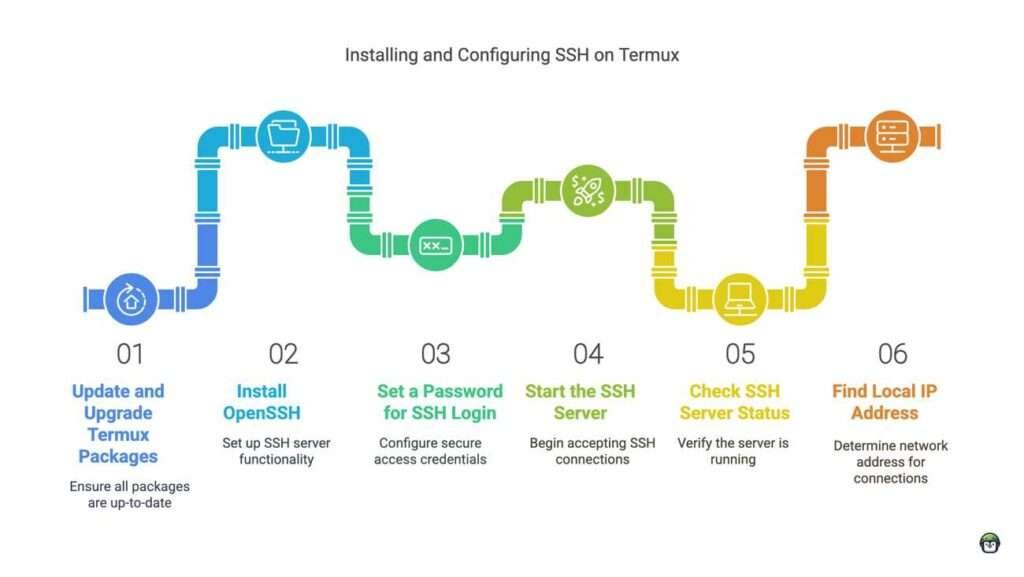
- 1. Update and Upgrade Packages
- 2. Install OpenSSH
- 3. Set a Password for SSH Login
- 4. Start the SSH Server
- 5. Check the SSH Server Status
- 6. Find Your Local IP Address
- 7. Connect to Termux via SSH (from Another Device)
- 8. Enable SSH Server to Start on Boot (Optional)
- 9. Configure SSH for Key-Based Authentication (Optional but Recommended)
- 10. Secure Your SSH Server (Optional)
- 11. Restart the SSH Server for Changes to Take Effect
- Troubleshooting SSH Setup in Termux
- Additional Troubleshooting for SSH on Termux
- Port Already in Use Issue
- Check for a Zombie SSH Process
- Conclusion

Setting Up SSH on Termux: What to Expect
Before we dive in, let’s get one thing straight—installing and configuring SSH on Termux isn’t just about running commands. It’s about unlocking real remote access from your Android device, using nothing but open-source tools and a few lines of terminal magic. Whether you’re a student, a sysadmin on the move, or just tired of being chained to a desktop, this guide walks you through the essentials of setting up SSH in Termux—from package installation to secure key-based logins.

1. Update and Upgrade Packages
Before installing OpenSSH, ensure Termux is up-to-date:
pkg update && pkg upgrade -y2. Install OpenSSH
Install the OpenSSH package to enable SSH server functionality:
pkg install openssh -y3. Set a Password for SSH Login
Since Termux doesn’t have a default password, you need to create one:
passwd4. Start the SSH Server
Launch the SSH server with the following command:
sshd5. Check the SSH Server Status
Verify that the SSH server is running and note the assigned port:
ps aux | grep ssh6. Find Your Local IP Address
You’ll need your device’s IP address to connect via SSH. Find it using:
ifconfig | grep inetLook for an IP in the format 192.168.x.x or 10.x.x.x (local network).
7. Connect to Termux via SSH (from Another Device)
From a PC or another phone, use the following command (replace <your-ip> with the actual IP):
ssh username@<your-ip> -p 8022The default SSH port in Termux is 8022, not 22.
8. Enable SSH Server to Start on Boot (Optional)
To start the SSH server automatically when Termux launches, add this to your .bashrc or .zshrc:
sshd9. Configure SSH for Key-Based Authentication (Optional but Recommended)
For added security, generate an SSH key and copy it to Termux:
Generate an SSH key on your computer:
ssh-keygen -t rsa -b 4096sshdCopy the public key to Termux:
ssh-copy-id -p 8022 username@<your-ip>If ssh-copy-id is unavailable, manually append the public key to ~/.ssh/authorized_keys.
10. Secure Your SSH Server (Optional)
Modify the SSH configuration file for better security:
nano $PREFIX/etc/ssh/sshd_configChange the port (if necessary):
Port 8022Disable password authentication (if using keys only):
PasswordAuthentication no11. Restart the SSH Server for Changes to Take Effect
pkill sshd && sshdNow, your Termux SSH server is properly installed, configured, and secured for remote access!
· · ─ ·𖥸· ─ · ·
Troubleshooting SSH Setup in Termux
When trying to set up SSH on Termux, you may encounter some common errors. Below are the most frequent issues and how to resolve them.
Error: Permission Denied, Unable to Bind to Port 22
If you try to bind SSH to port 22, you might see the following error:
Bind to port 22 on :: failed: Permission denied
Bind to port 22 on 0.0.0.0 failed: Permission denied
Cause: This happens because Termux doesn’t have root privileges to use port 22. SSH ports below 1024 are known as privileged ports and require root access to bind services. This is a security measure in Linux-based systems to prevent unauthorized users from running system-critical services. Since Termux does not run as root by default, you need to use a non-privileged port (e.g., 2222 instead of the default 22).
Solution:
Change the port to a non-privileged port above 1024 (e.g., 2222):
Port 2222After editing the port in the configuration file, restart the SSH service:
sshd· · ─ ·𖥸· ─ · ·
Error: SSHD Not Running
If SSHD fails to start or seems unresponsive, running it in debug mode can help:
sshd -dDebug mode provides logs that can pinpoint the exact problem, whether it’s a configuration error or a permissions issue.
· · ─ ·𖥸· ─ · ·
Error: Unable to Bind to Any Address
If you receive this error:
Bind to address 0.0.0.0 failed: Permission deniedEnsure you’ve correctly set the port above 1024 in the configuration file. Additionally, check that no other process is using the selected port.
· · ─ ·𖥸· ─ · ·
Additional Troubleshooting for SSH on Termux
Error: Connection Refused
If your SSH connection is refused, verify that the SSH server is running by checking the process:
ps aux | grep sshdIf SSHD isn’t running, start it again:
sshdError: Server Listening on the Wrong Port
If you can’t connect to Termux, check if the server is listening on the correct port by running SSHD in debug mode:
sshd -dThis will display logs indicating the active port and any potential issues.
· · ─ ·𖥸· ─ · ·
Port Already in Use Issue
Bind to port xxxx failed: Port already in useCheck What’s Using Port 2696
Run:
ss -tulnp | grep 2696or
netstat -tulnp | grep 2696This will show which process is using the port.
If this returns an empty string, do this:

Check for a Zombie SSH Process
Even if ss and lsof show nothing, an SSHD process might still be running. Try this:
ps aux | grep sshdIf you see any sshd processes, kill them:
pkill sshdThen restart SSH:
sshd· · ─ ·𖥸· ─ · ·
Conclusion
By following this guide on how to set up SSH on Termux, you’ll be able to access and control your Termux environment remotely. Whether you’re troubleshooting SSH errors or simply looking to connect via another device, these steps will ensure a smooth experience. Remember, SSH is a powerful tool for remote management, but make sure to configure it securely by changing the default port and using strong passwords.
Leave a Reply